Category Archives: Bikes

Adjusting My TD Bike For A Great Divide Tour

Tour Divide bikes are typically set up to be fast and light – capacity to carry enough food and water until the next resupply with little room to spare.  Very few luxuries are packed.  If you’re not eating or riding, you’re probably sleeping.

When I decided to tour part of the GDMBR instead of race it, a number of variables changed.  I had intended to average 120 miles/day when racing.  Now I think I can do 75-100 miles/day depending on terrain and services and still stop to take more pictures, enjoy more sit-down meals, set up camp earlier in the evening, and enjoy cooked campsite breakfasts/dinners.  And since I no longer need to make mileage at all costs, I can afford to pack a few more luxuries (within reason).

Now that I’m touring part of the route, these are the luxuries I’ve added:

  • Cook set: stove + pot + mug + fuel bottle
  • Zip-off camp pants + a spare shirt
  • Boonie hat (possibly)

A few very simple things that I think will hugely increase my enjoyment on the trip.  I’ll be able to start the day with hot oatmeal and tea or coffee and cook a dinner while watching the sun set.  With some spare clothes, I’ll have something to change into that isn’t nasty riding bibs/jersey.  Plus, on rest days, I’d rather walk around in less-nasty clothes.

These additions come at a cost, though: weight and volume.  Honestly, the weight isn’t a huge concern for me.  Back in 2010 I carried denim jeans, a pair of keen shoes, a spare poncho, a full 1 person tent, 20 oz fuel bottle, a solar charger, and the “Cycling the Great Divide” guide book.  Additionally, since then I’ve replace many of the other items (water filter, multi-tool, tire pump, sleeping bag, tent) with smaller, lighter alternates.  With unseasoned legs and all that extra weight, I still managed to complete the entire Great Divide, albeit walking much of the time.  Adding 2-3 pounds of luxury items (a cook set + pair of pants) to a relatively minimal setup isn’t going to make or break my trip.  I don’t know what my old rig weighed with gear, but I’m guessing my current setup, even with the two new additions, weights 10-15 lbs less.

Volume is the killer, though, with my racier bikepacking setup.  In 2010, I had four panniers, a backpack, and the tops of the racks to strap stuff onto.  I remember riding into the Great Divide basin from Rawlins with 10 liters of water in addition to 2-3 days of food and normal day-to-day equipment.

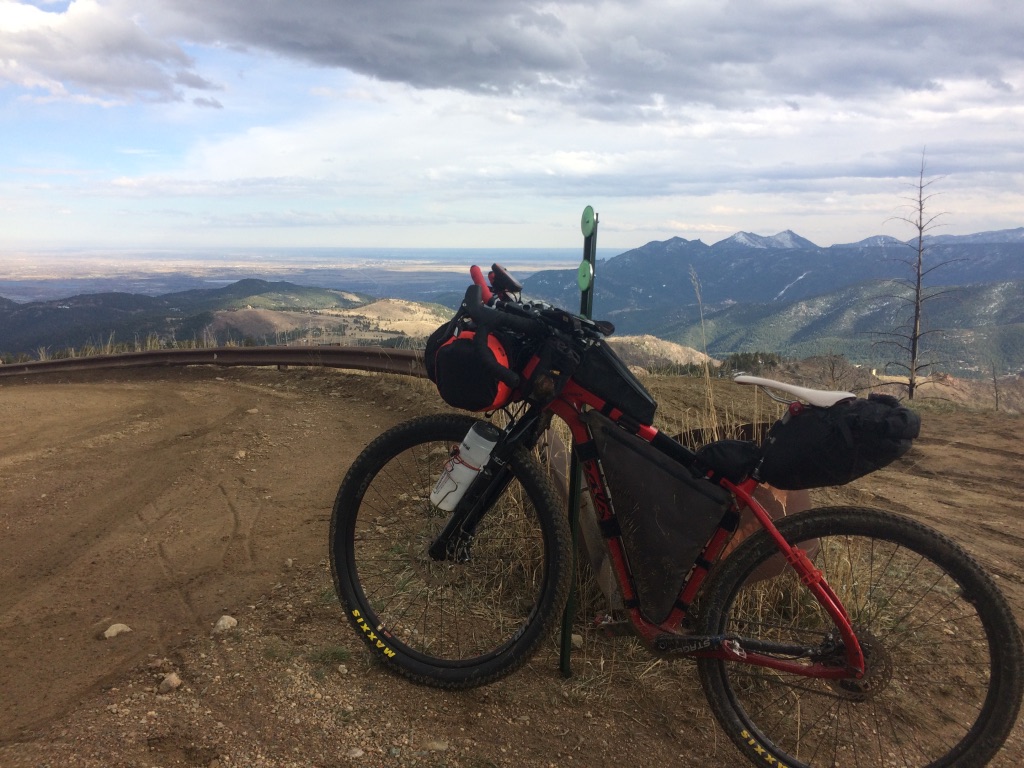
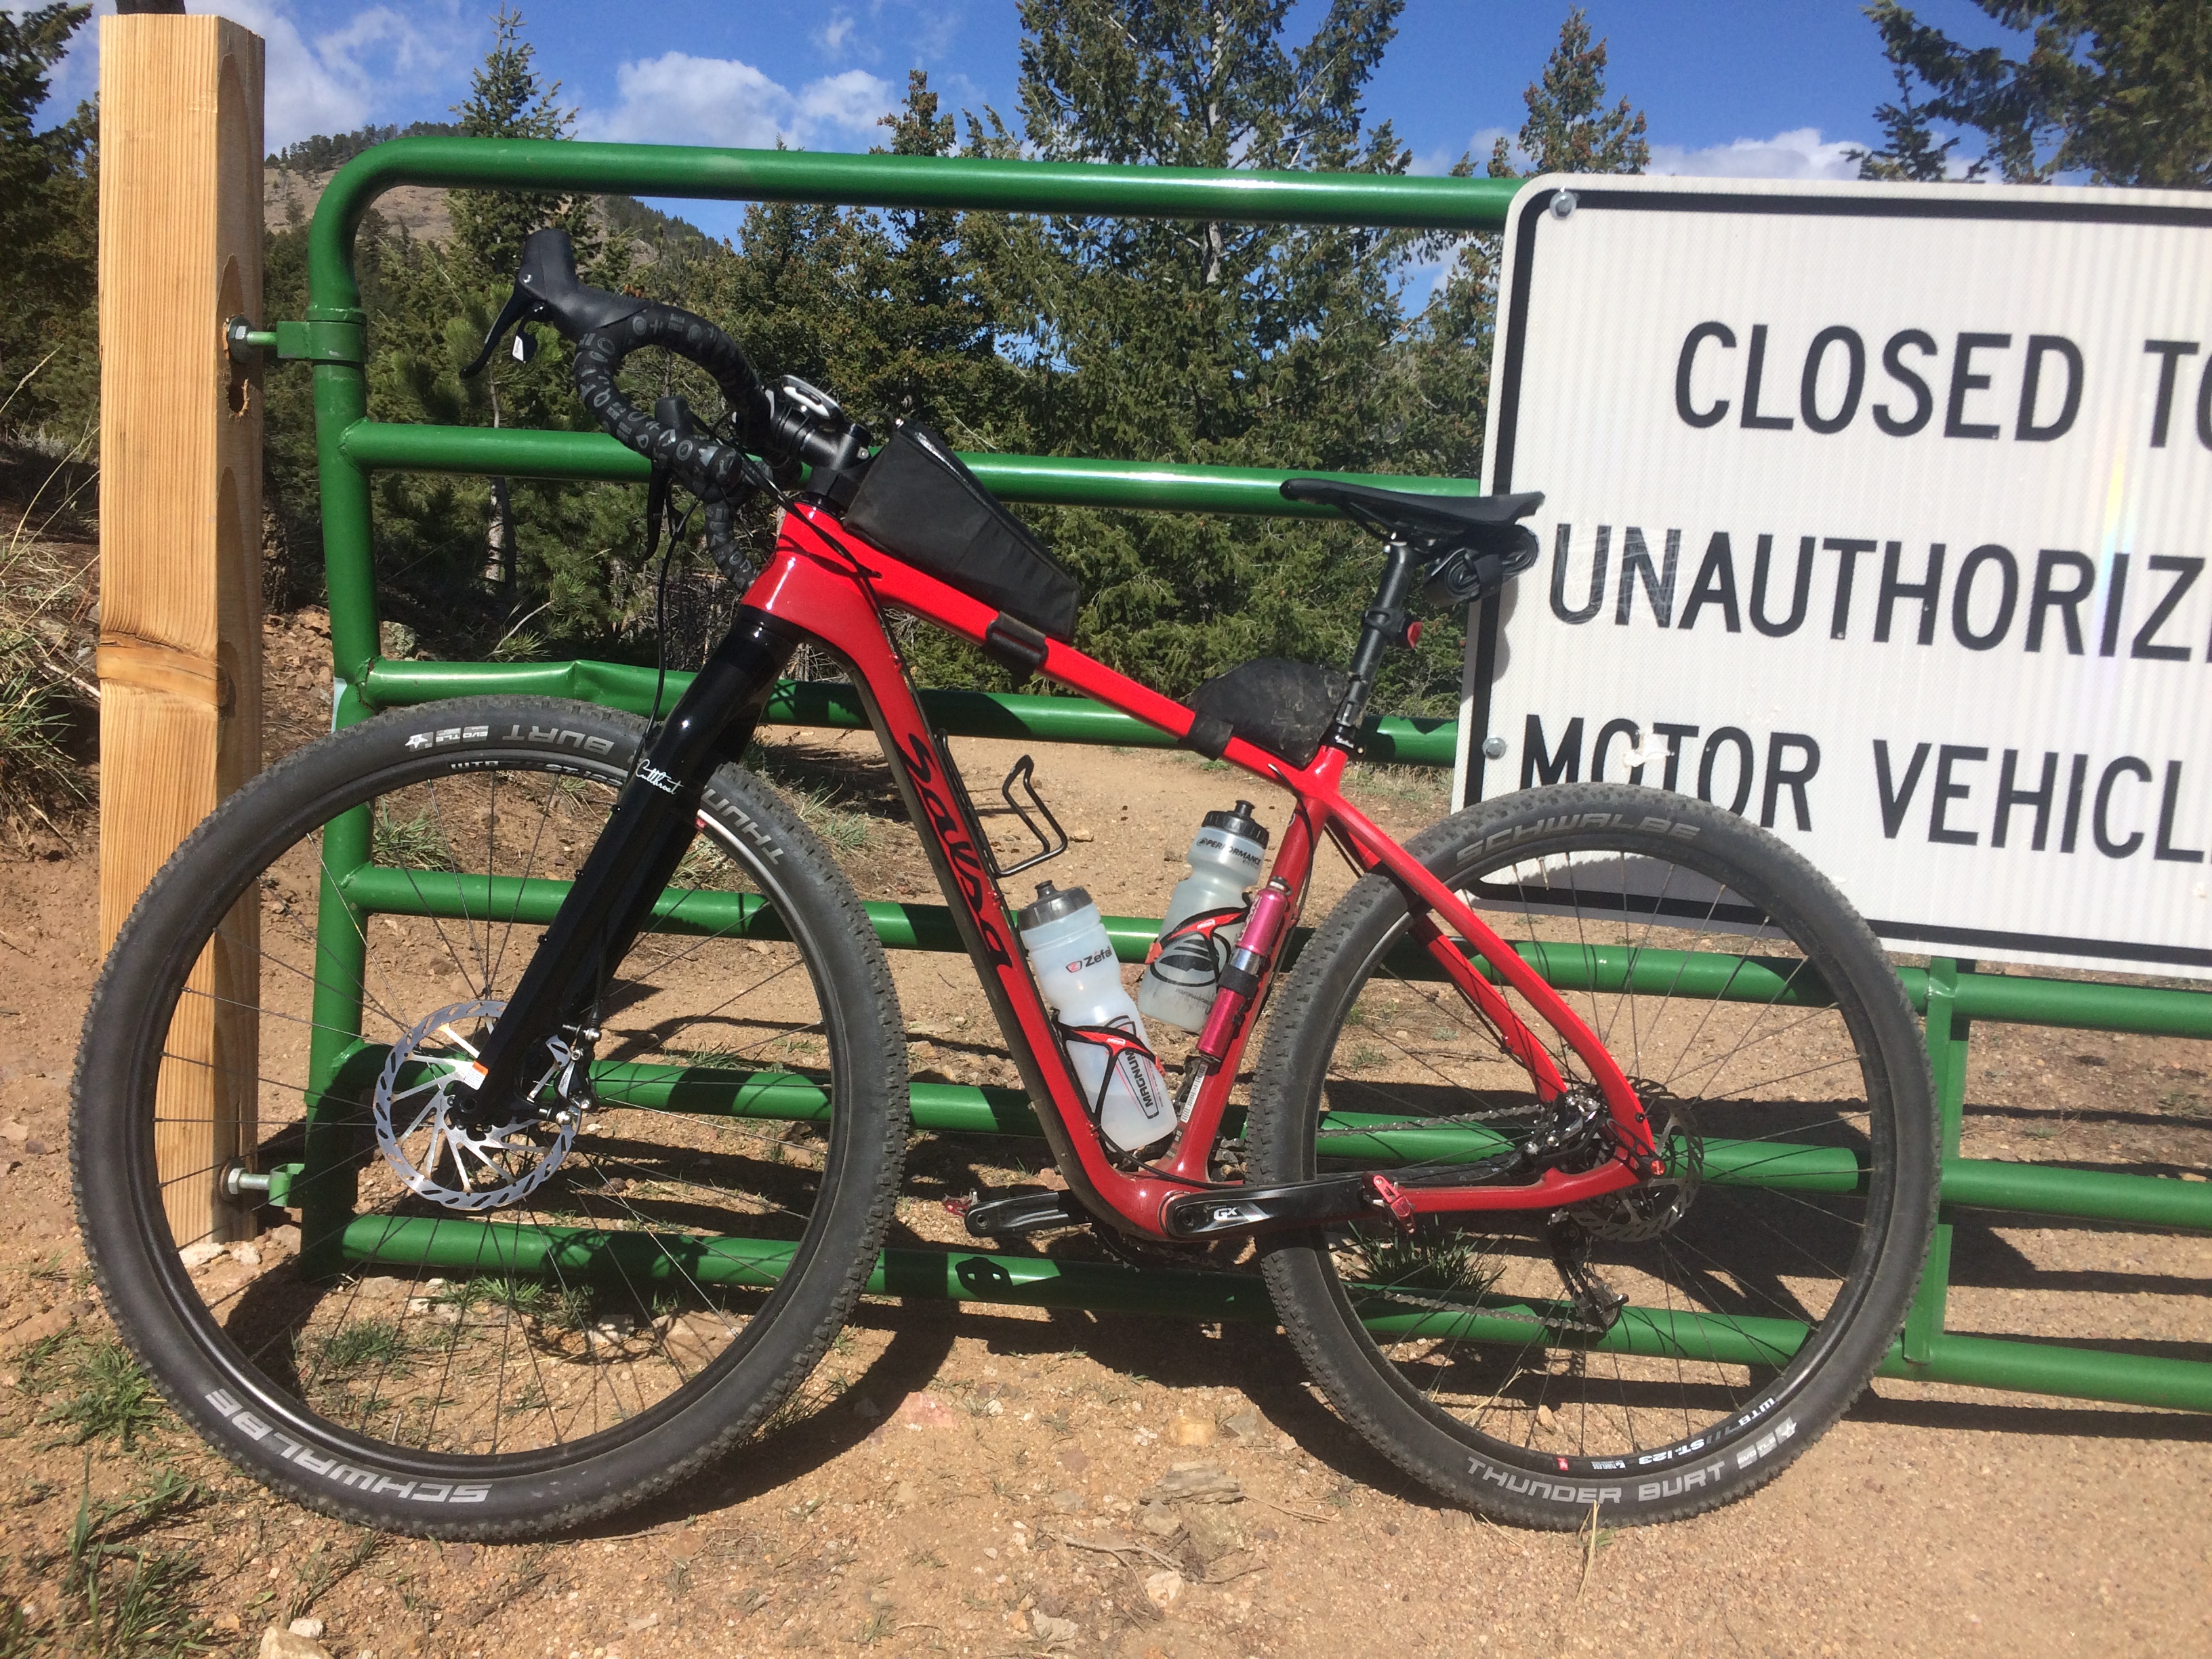
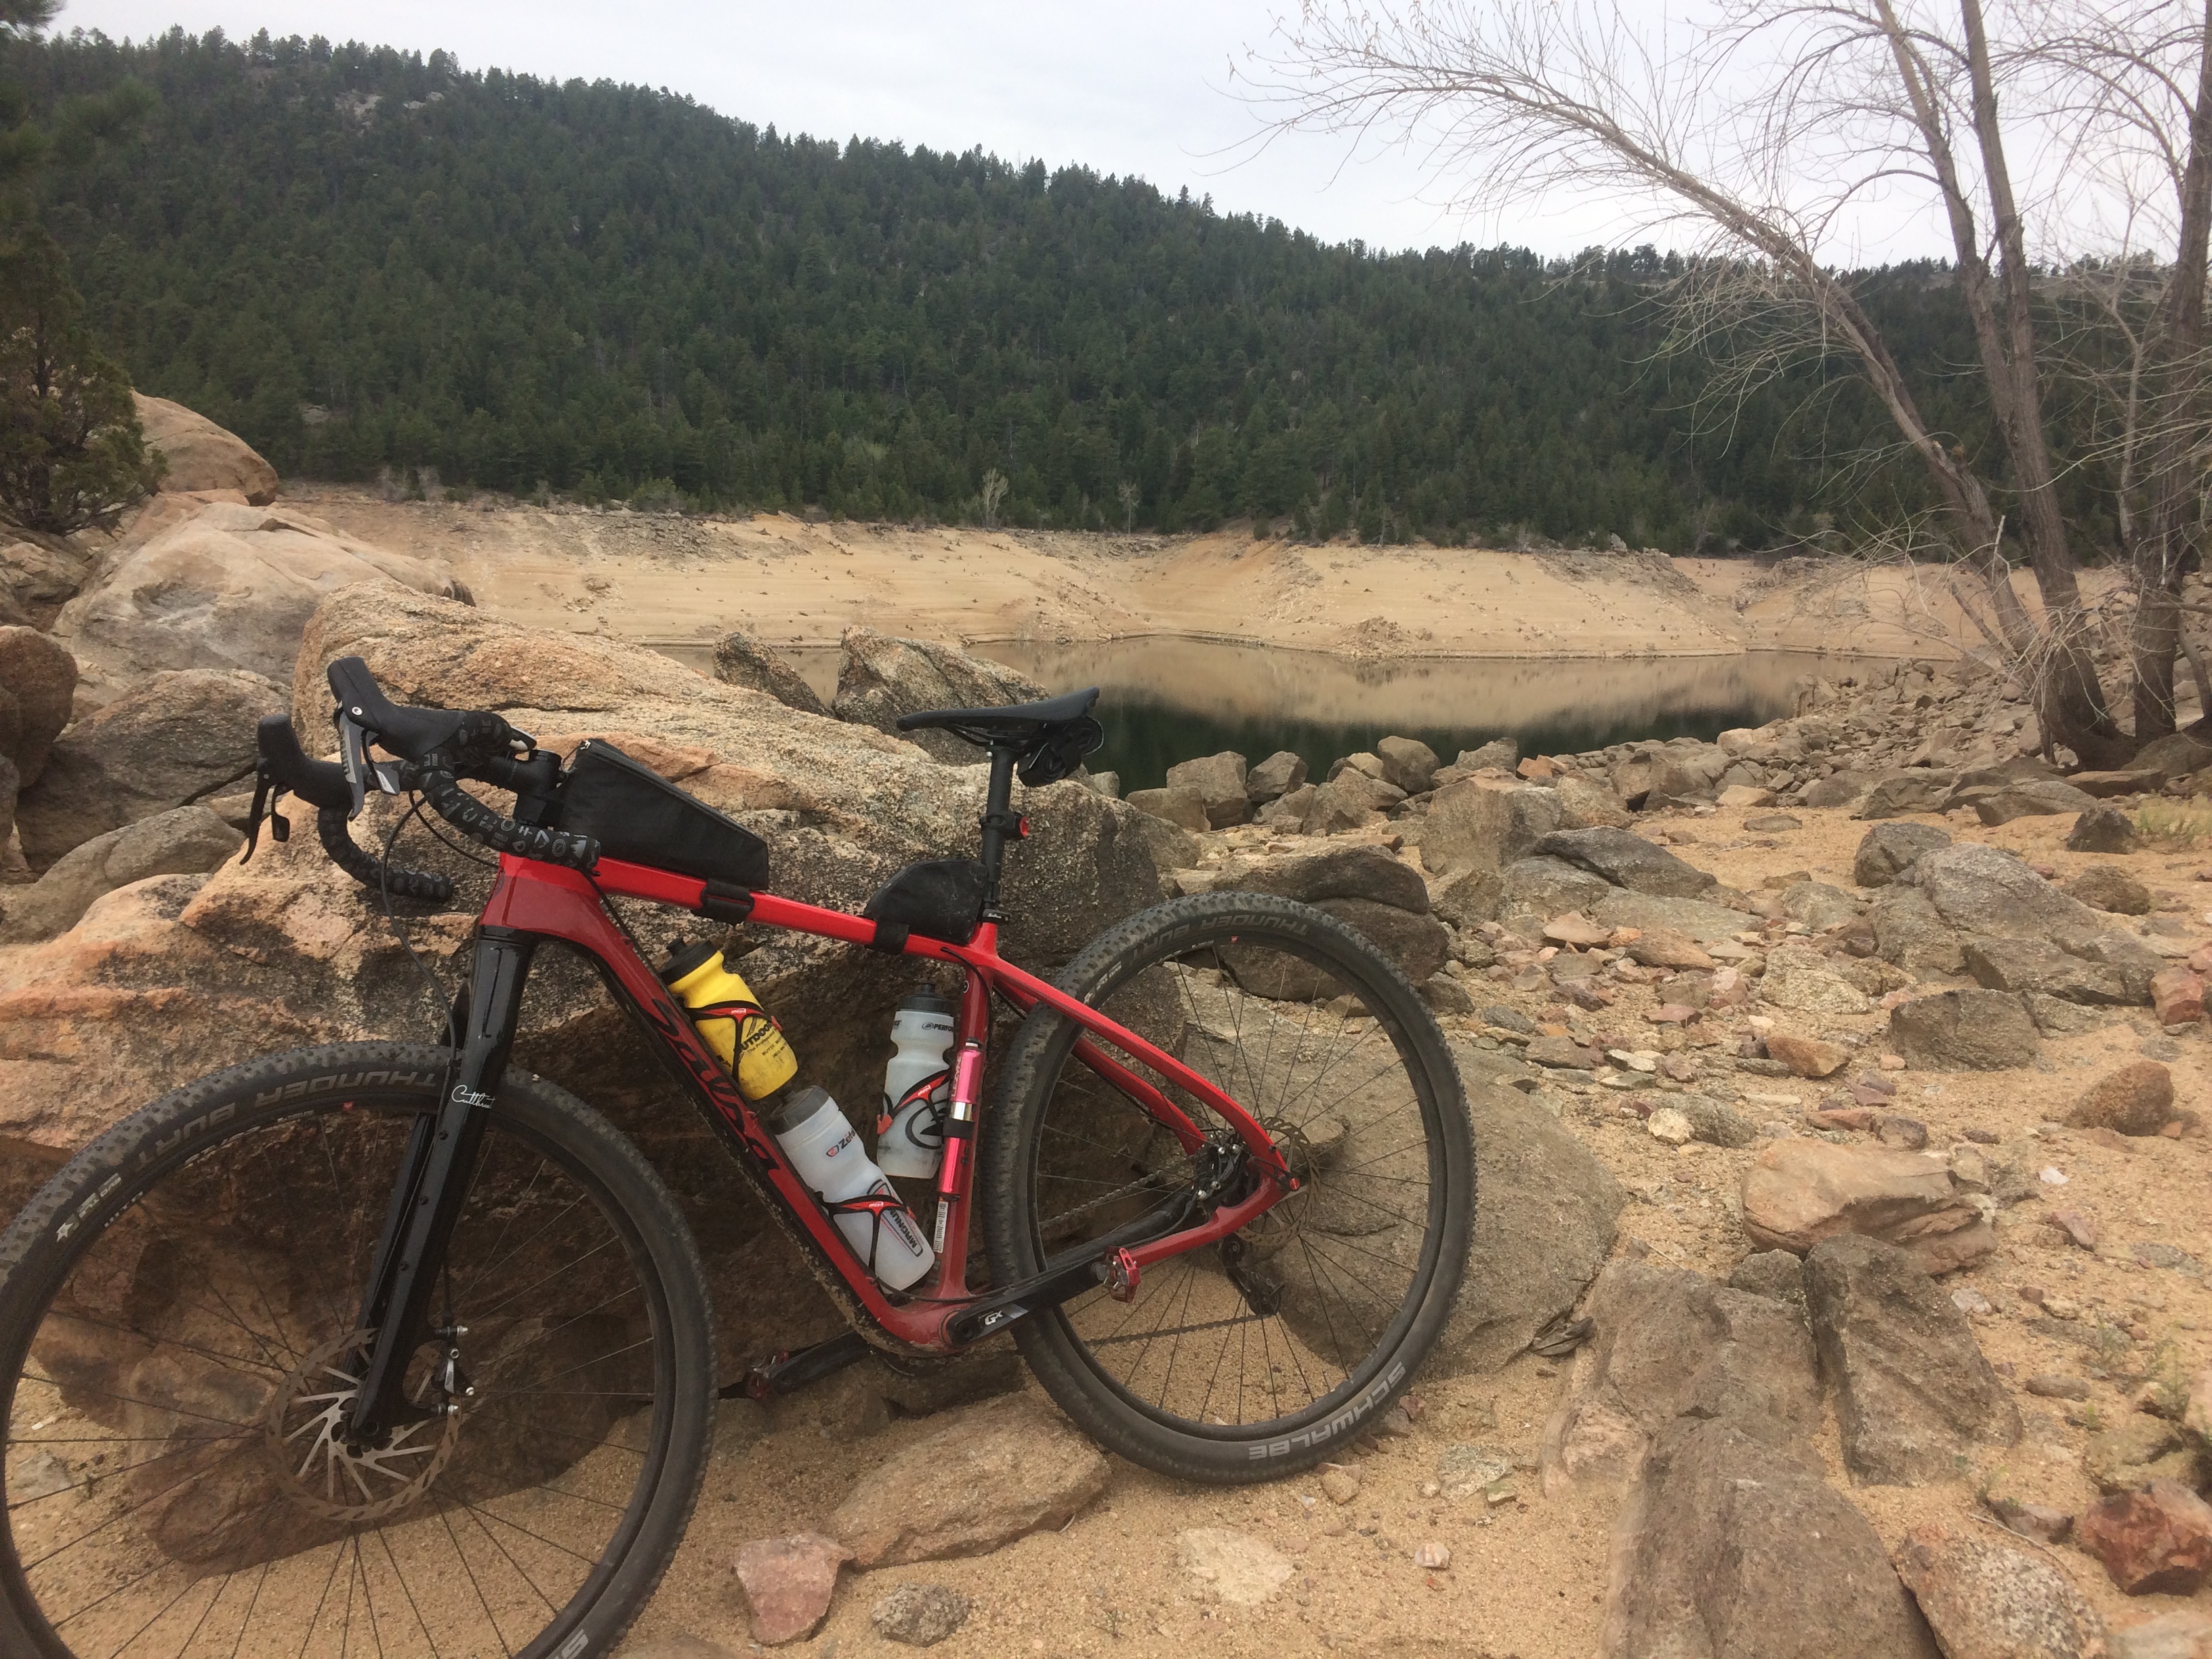
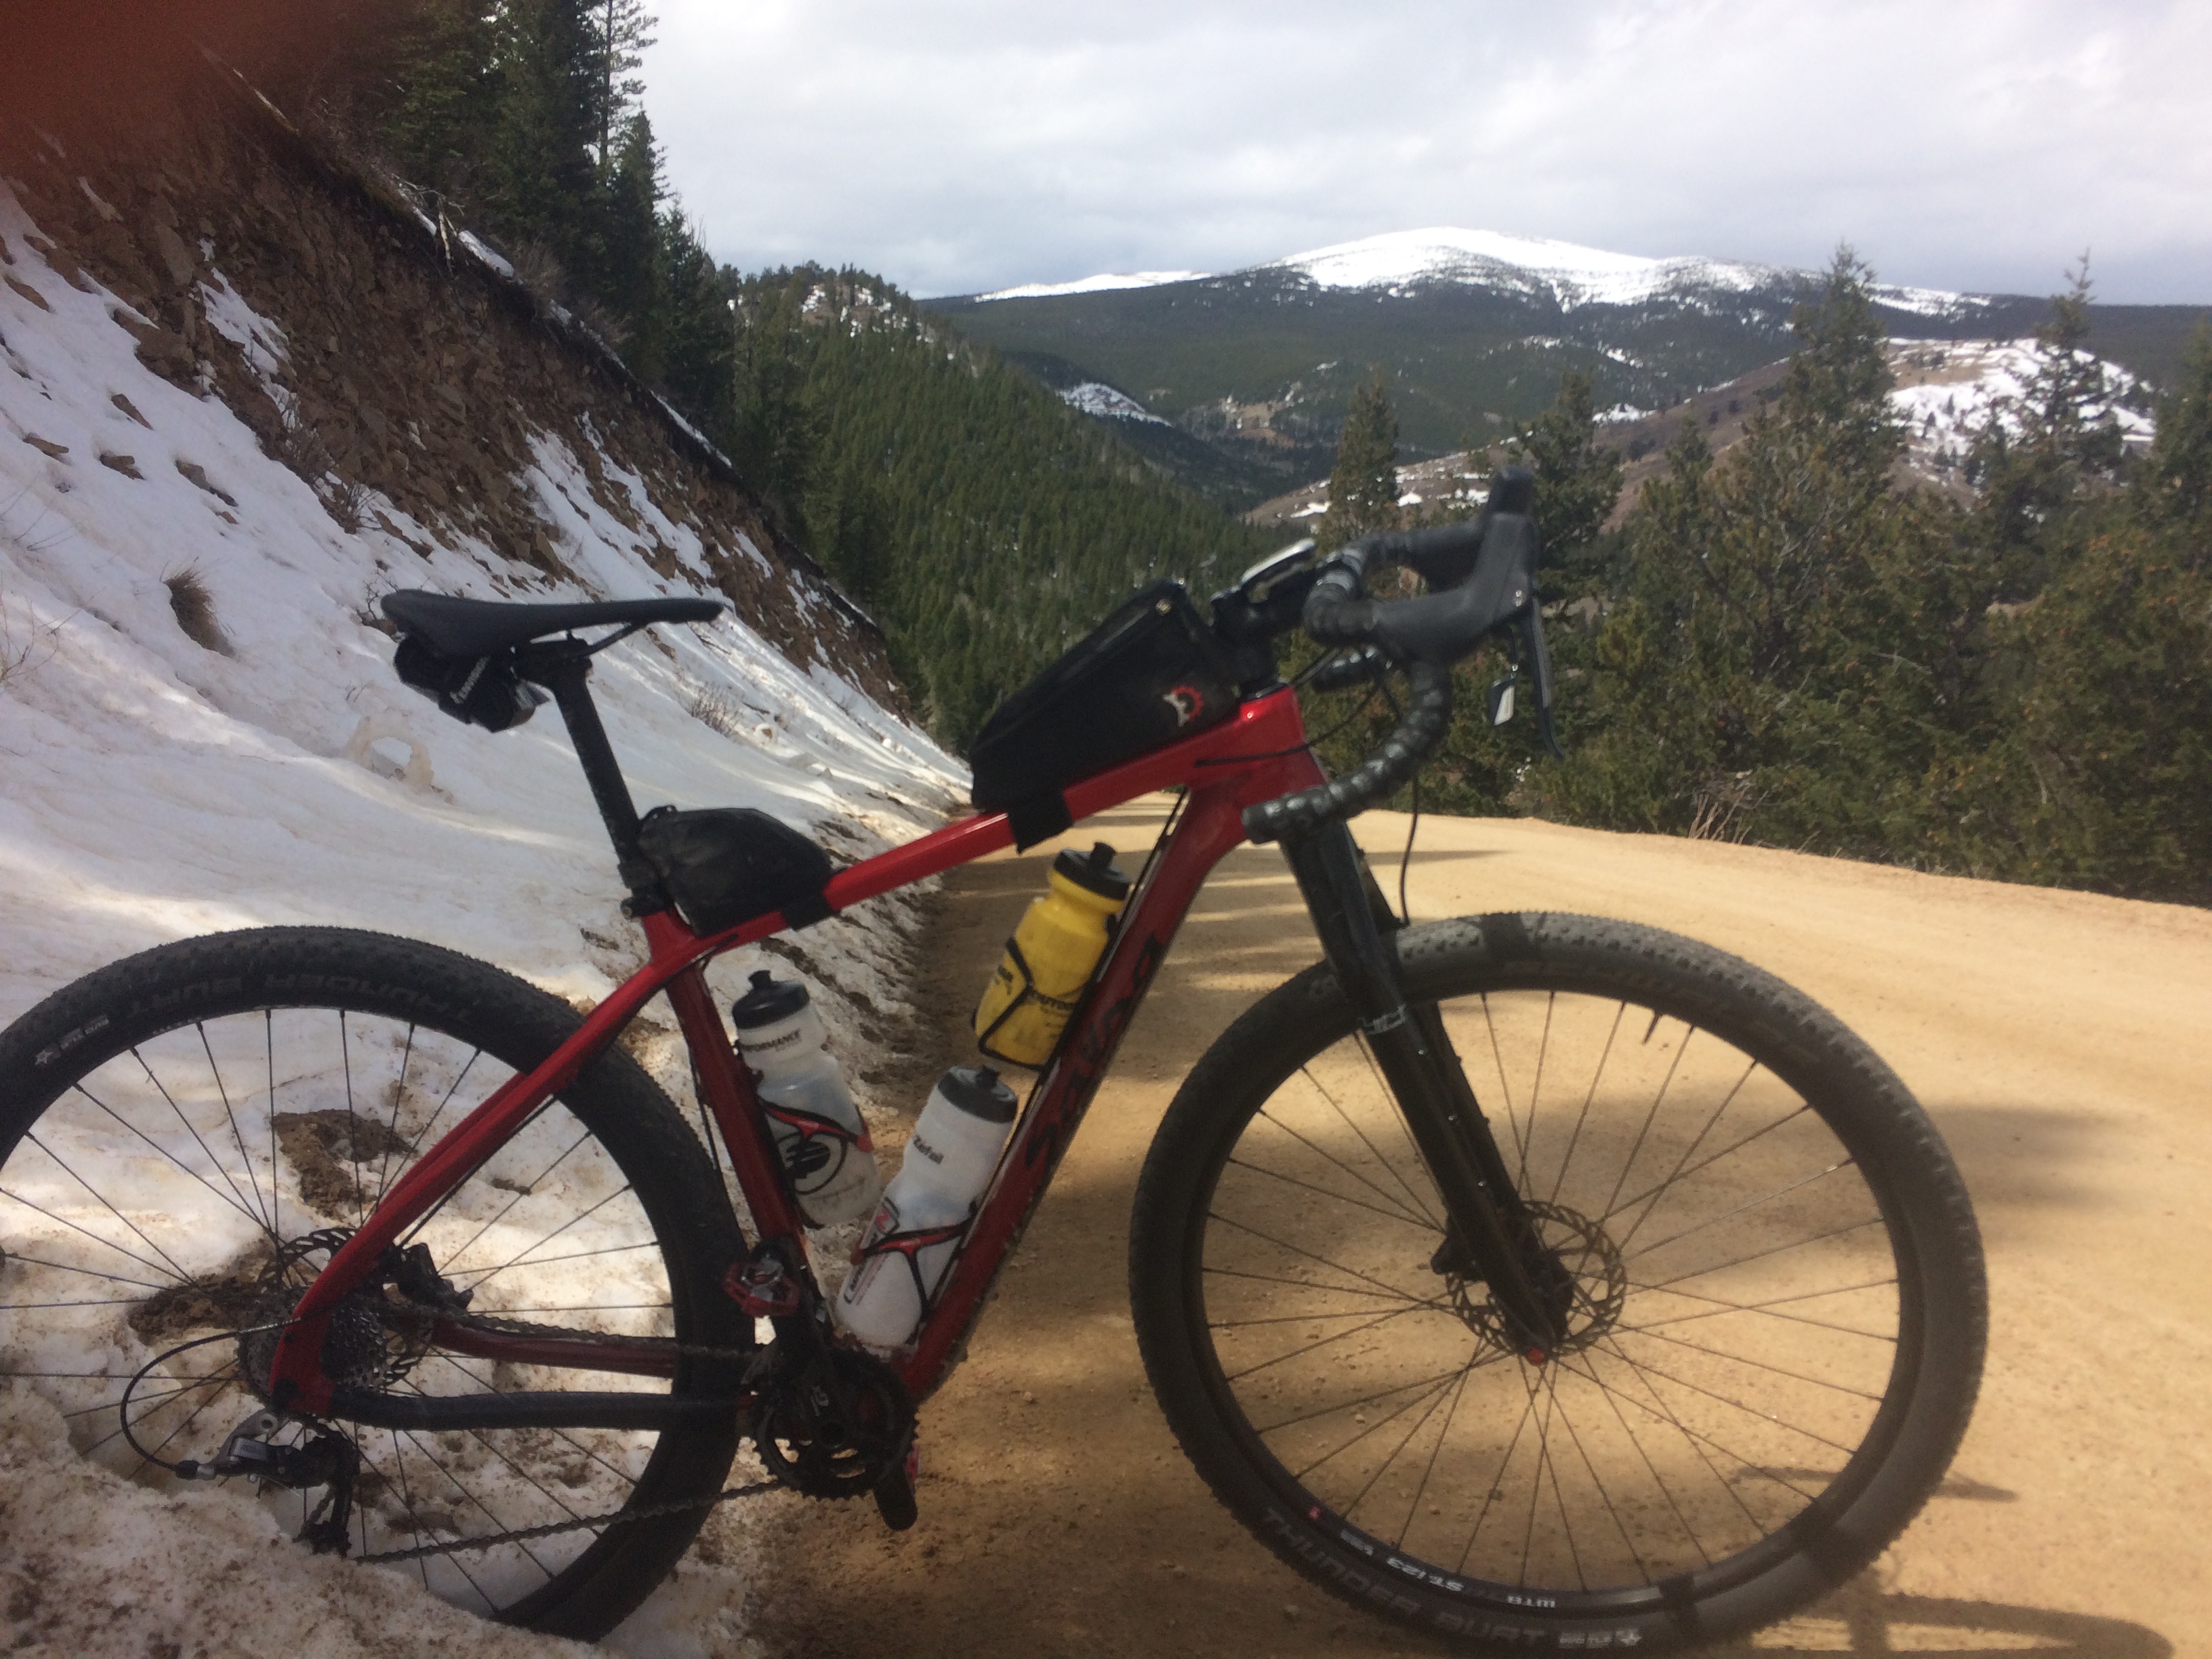
Now I’m limited to a handlebar roll + bag, feed bags, fork and under-downtube bottle cages, frame bag, top tube bags, and a seat bag.  The clothes and especially the cook set use a decent amount of volume in my seat bag that would otherwise be used for food storage.  The additional catch-22 is that I’ll ride through resupply points less frequently, so I need to carry more food, and I’ll need more food/water to fuel carrying the extra weight.

How To Increase Storage Capacity?

The easiest solution is to carry a backpack.  There are some major downsides, though: extra sweating from less jersey ventilation, increased weight on the saddle and hands, and I haven’t worn a backpack while riding for many years.  I wanted to avoid this option if possible.

Adding storage volume without a backpack takes some creativity.  I purchased a pair of bike feed bags and rigged them up so they could hang off the sides of the seat bag.  It looks super dorky but they can hold a decent many thousands of food calories.  In addition, I can pack a micro stow-able backpack – the kind that packs down to the size of two golf balls and weighs 3 ounces – to expand storage capacity only when it is necessary.

The downside to it is that food is heavy, and having that weight high up, off-center, and not entirely wobble-free made the bike feel very heavy while riding.  I tried it on some test rides, but I couldn’t feel confident that this system would last the duration of my trip.

So – what about a backpack then?  I have an old Osprey Syncro 15 that I used on the Colorado Trail that is ready for service.  It’s simple, adds a LOT (15 liters) of storage capacity, and easily handles odd-shaped things like a stack of tortillas.  Loading a backpack is much less of a game of Tetris than loading a seat bag.  And unlike in 2010, I’m smart enough now to know to use the backpack for lightweight, bulky items: like spare clothes, rain items, and food that I’m about to eat.  NEVER EVERY would I carry water on my back on the Great Divide.

I’ve chosen to go with the backpack.  95% of the time it’ll carry only my spare clothes.  The flexibility it affords also reduces my packing anxiety.  If it starts raining, I can quickly throw anything into the backpack and it’s protected.  At night, I can throw spare miscellaneous items in it and everything is together and waterproof – simpler than fitting everything back the various frame bags.


We’ll see if I regret the extra weight on my pressure points, but it is comforting to know I have more volume available for food/water and less packing Tetris to deal with.


Gear Inches and Granny Gears

On some recent climby training rides, especially when feeling effects of accumulated fatigue, I found myself wishing for a lower granny gear.  I’ve been riding a 28/42 crankset + 11-36 cassette.  With a 2.2×29″ tire, that’s roughly 22.5 gear inch granny gear (and 110.3 gear inches on the high end).  I’ve been riding this for a while now and it’s been fine for normal, unloaded riding.  Throw in back-to-back long/climby days and 20+ lbs of gear, water, food, and trying to ride at a more sustainable “all day” pace – a lower granny gear would be nice.

Back in 2015 when I trained for the TD I was running a 1×11 with a 30-42 granny – 20.6 gear inches.  I never considered that granny gear to be inadequate, but I didn’t like how I spun out almost any gradual descent.  The high-end was a meager 86.7 gear inches.

So I figure I have two options:

  1. Replace the 28/42 chainrings with 26/39.  That would change the gear inch range to 20.9 – 102.5.  A granny gear 7% lower than previously.
  2. Keep the 28/42 chainrings and add a 42T Wolftooth cog to the cassette. Gear inch range:  19.3 – 110.3.  A granny gear 14% lower than previously.

I opted for #2 and installed it last night.  It offers a lower granny gear without sacrificing the upper range.

Because we’re adding a new granny gear, a different cog must be removed – typically the 15T or 17T.  The downside is that it introduces a larger jump between gears: 11-13-17-19-22 or 11-13-15-19-22.  Of course, Wolftooth thought of a solution for this: replace the 15T and 17T with a 16T cog.  So the stack looks like 11-13-16-19-22.  Two 3T jumps jumps instead of a 2T and 4T jump.

And here it is, in red of course.  Very nice looking!

In the work stand everything sounds and works fine.  For the first time ever, I actually had to add links (just one) to a new chain for it to be the proper size.  We’ll see how it works in the field soon enough.  Mental notes to myself: how noticeable the lower granny gear is?  Has shifting crispness has changed at all? Are the jumps between the 13-16-19 cogs more jarring?


While on the topic of gear inches, I just had to figure out my granny gear of the commuter bike I rode on the Great Divide in 2010.  28/38/48 crankset + 11-32 cassette with 2.2×26″ tires: 23.1 gear inch granny gear.  So slightly harder than the cutthroat’s 28/36 granny.  Considering I had never ridden in mountains, inefficient bike position, a heavy bike, and a far more/heavier gear I don’t know how my knees didn’t explode.  On the high end, the 48/11 combo gave 115.2 gear inches.  Even with such a tall gear, I remember spinning out on various descents, wishing to be able to pedal to generate some warmth.

Tour Divide: Southbound vs Northbound

I put my name on the start list in early February as a Southbound Grand Depart participant.  After reading reports of above average snowpacks in Canada/Montana, and below average snowpacks in New Mexico/Colorado I’m starting to consider a Southbound start.

Reasons to Ride Southbound

I signed up as a Southbound racer for a few reasons: to be part of the Banff Grand Depart experience, easier travel arrangements (fly to Calgary, have family/girlfriend waiting in Antelope Wells), and more chance of companionship.  Ego, convenience, and safety in numbers.

There’s certainly an appeal to being part of the mass start.  Being mid-pack with other racers, lots of people on the route would know what we’re doing.  I remember riding into Cuba and having drivers wave at us as if they knew we were touring the GDMBR.  It felt good to get that recognition.

Travel arrangements are easier for me ending in AW.  My family lives in the Denver area, so for them to get to AW is just a 11 hour drive.  I imagine being able to arrange something roughly like, “once I’m halfway between Pie Town and Silver City, Drive to Silver City and wait there.  Once I hit Separ, start driving to the border.”

Companionship shouldn’t and can’t be counted on, but early in the race I think it would help to build confidence before settling into a routine.  Knowing that there will be 100 others around +/- a few days is psychologically comforting.

I think I would prefer ending the race in Antelope Wells, having completed the route the other direction.  A tour or TD race is such an experience that I want a chance to reflect on the trip.  The solitude of the desert and boredom of flat pavement would let that happen.

I remember riding up the Spray River Trail rounding a corner and suddenly being at the trailhead, my GDMBR trip finished.  I suddenly became just another tourist in Banff.  Instant culture shock.  Suddenly thrown into a crowded town that doesn’t match the experience of the preceding 2,700 miles.

Reasons to NOT Ride Southbound

  • Colder weather in Canada/Montana
  • Hike-a-bike due to large snowpack
  • Hike-a-bike through snowmelt
  • Hotter weather in New Mexico
  • Less surface water available in New Mexico
  • Greater chance of monsoons + peanut butter mud in New Mexico

Cold is one of my greatest fears. The 2014 race started with a week of snow and rain.  As someone whose feet sweat profusely and constantly has cold hands (poor circulation?), that sounds miserable.  Like quit-the-race miserable.  Walking through snowmelt runoff streams for the first few days – I imagine my feet would get numb and stay that way all day, regardless of clothing choices.

Then there’s the “unknown.”  Most rookies go into the race with no firsthand knowledge of the route.  I have the small advantage of having ridden S=>N once before.  I know roughly what supplies are available at various towns.  I remember some water sources in dry areas, and can remember roughly what much of the route looked/felt like.  If I were to ride southbound, my knowledge of the climbs would be wasted.  I had to hike up Fleece Ridge and suffer up the climb out of Radium, but I got to enjoy massive descents down to Abiquiu and Del Norte.  I don’t know what the experience is like in the opposite direction.

It’s typically stated that the route Southbound climbs gradually and descends steep.  I think my riding style now favors steep climbs and more gradual descents – the Northbound direction.

General Race Outlook

When I was sure I was racing Southbound, I mostly felt worried about prolonged wet/cold and being in bear territory on day one.  Plus, ending day one with a 3 hour hike-a-bike up the quad trail/river to Koko Claim is a bit daunting.

When I consider riding Northbound, it feels like a weight is lifted from me.  I’ve ridden that direction before.  I don’t have to worry nearly as much about weather.  Getting to Silver City and beyond should be a relatively simple first day.  Getting through the Gila to Pie Town and Grants will be challenging, but it can be planned for.  I’m accustomed to riding in mountains, unlike eight years ago.

I think I will gain a lot of confidence on days one and two if starting in AW.  I remember struggling on the “hills” between Hachita and Silver City.  I remember the first climb on gravel heading into the Gila, how I had to walk after a few hundred yards.  And also the climb out of Black Canyon 30-40 miles later.  From my journal:

The climb out of the canyon was absolute hell. It consisted of many miles of steep roads covered in loose gravel. It had me pushing my bike in no time. Even that was difficult.

After checking elevation profiles on Strava, the climb out of Black Canyon is a 2-mile 6-7% climb.  “Absolute hell” for 2010 Dave, but not a big deal at all for 2018 Dave.  I look forward to doing those climbs again and thinking to myself “hey, I can do this thing!”

In Summary

I’m 90% sure that I’m going to ride South to North at this point.  And if I do choose to go Northbound, the question then becomes: leave with the NoBo Grand Depart, or leave a day or two earlier, or leave a few hours earlier (daylight is more of a premium in NM)?

Southbound Pros

  • Group start experience
  • Not likely to ride completely alone
  • Easier pickup from AW

Southbound Cons

  • Cold, rain, snow
  • Snowpack = hike-a-bike
  • Flying with bike: possibility of damage
  • Heat + mud in NM

Northbound Pros

  • Drive to start: no bike reassembly
  • Cooler in NM/CO
  • Warmer in MT + Canada
  • Less chance of NM mud
  • Climb steep, descend gradual

Northbound Cons

  • Likely to ride alone the entire race
  • Sparse resupply immediately

Tour Divide Training: February – March 2018

February
I continued with TrainerRoad’s Sweet Spot Base II Mid Volume plan, which wrapped up on Feb 24.  I only did a total of three outdoor rides this month for a total of 73 miles.  It’s easy to look at that and feel unaccomplished.  I have to focus on the fact that I did 14 hard trainer rides, which are far more effective at building strength than outdoor miles.

March
March started with a recovery week after the Sweet Spot Base phase, then another FTP test.  This time I scored an FTP of 242 – up 4% from my previous test and up 10% from my first test.  W/kg: 3.68.  It felt good to achieve a higher number.

The next few rides I did outside, and I noticed that I felt unbalanced on the bike.  Riding outdoors (and actually moving) didn’t feel natural.  That was a bit disconcerting.  I decided that it was time to start riding outdoors more.

I attached all bags, bottle cages, lights, and gear to my bike in mid-March to start acclimating to the heaver load.  I’ve loaded about 95% of my gear (some kinks need to be worked out), and now always carry extra water for training weight.  I even did a night ride to start getting rid of the “dark trails are scary” feelings.

I ended up logging 402 miles over 12 rides plus another three trainer workouts.  I definitely need to step it up in April.

Tour Divide Training January 2018

What?!  Tour Divide training?  Official Letter of Intent coming in the future, but yes, I am committed to racing the Tour Divide this year.  I even added myself to the official unofficial start list.  I’m going to start recording my training (physical and otherwise) to help organize my thoughts and keep myself accountable to making it to the start line.

Training Plan

When I trained for the TD in 2015 (but didn’t get to the start line) I just rode my bike a lot.  Long days in the mountains, hill repeats, etc all with my bikepacking gear.  I think what I did would have adequately prepared me to complete the race, had I shown up.  It wasn’t very efficient, though, and I have no idea how strong I was at the end of training compared to the beginning.

That is going to change this year.  I like plans, numbers, and measurable results.  I finally bought a power meter and dedicated trainer wheel for my Cutthroat – it was long overdue.  Armed with power data and a TrainerRoad subscription, I have one goal for now: increase my FTP as much as possible until Spring.  I would be very happy to be in the 275 to 300 watt range prior to the Grand Depart.

Here’s the high-level physical training plan:

  • Sweet Spot Base I (complete)
  • Jan 22 – Mar 3: Sweet Spot Base Phase II Mid Volume (in progress)
  • Mar 5 – April 28: Sustained Power Build Phase (doing increasingly many rides outdoors with gear)
  • May: More logistical rides (multi-day rides, set up/break camp in rain, specific elevation/mileage goals, night riding, etc.)

Progress So Far

Last November when I started training I took my first 20 minute FTP test and achieved a result of 220.  At 145 lbs that put me at 3.34 W/kg.  Pretty solid, I think, for having never trained with any structure beyond “I feel like riding today.  I’ll go…there!”

I started with TrainerRoad’ Sweet Spot Base Low Volume I, but found myself wanting a bit more work during the week.  Halfway through I switched to Mid Volume I to add an extra hard workout to weekends and a mid week low intensity endurance ride (this one I often skip, because BORING).

Near the of January I started Sweet Spot Base Phase II and took my second FTP test: 232 and 3.53 W/Kg.  Immediately after I finished I realized I could have gone bit harder.  My 5 minute splits were 237, 245, 245, 254.  I certainly suffered, but not nearly as much as during the first test.  I think upping my cadence from low 80s to mid-90s helped a ton as well – gotta burn fat and save that sugar!

As of the end of January I am in the middle of the second week of Sweet Spot Base Phase II.  It’s certainly type II fun, but I really enjoy being able to feel worked after 1-2 hours.  If I were doing 1-2 hour rides outside I wouldn’t get nearly the same quality of workout.

I really looked forward to my second FTP test and still feel the same way about my upcoming third test.  Being able to measure improvement is so motivating!  I hope to see even more improvement in my next FTP test than my second.  High 240’s would be great.  250+ would be a nice milestone to break, too.

What I’ve Learned

Learning about FTP, power zones, and pacing has been eye-opening.  Same with the instructions that display with TrainerRoad workouts.

I’ve been pedaling incorrectly this whole time!  Prior to TrainerRoad my natural cadence typically fell in the 80-85 range, probably lower on climbs.  What I didn’t know is that puts my fuel consumption further into the sugar side of the spectrum than ideal.  Spinning faster allows the body to burn more fats instead.  Spinning a cadence of 90+ now seems very natural.

In the past I thought there was value to doing long or hard rides with minimal food to train your body to do without it.  I now realize that improper nutrition gets in the way of training effectively.  I still think there is value to pushing through those discomforts on purpose occasionally, I see them as destructive session rather than constructive.  Rides like that might make you mentally tougher and unlock some “I made it through that, so I can get through this” attitude, but might not contribute to physical fitness effectively.

I also now understand the concept of power zones and their physiological tolls.  Most importantly right now: an all-day pace that an endurance rider can sustain is in the range of 60-75% of their FTP.  Obviously a person with a higher FTP can put out more power all day than another rider with a lower FTP.  Additionally, higher FTP means you can stay in your efficient zones for more time.  Take two riders with FTPs of 200 and 250.  Both can sustain 175 watts for a time, but it will be far more taxing on rider one.  175 watts falls on the high end of tempo whereas it is solid endurance zone for the stronger rider.  Short bursts into the 225 watt range would put rider one into anaerobic zones whereas rider two stays aerobic.

When I look back on the Great Divide, I realize how much fitness I lacked.  I was constantly miles behind the other guys and had to work hard to not be too slow.  I was likely riding well above my endurance pace, taxing my body more than if I rode consistently at my all-day pace.  I imagine that my fitness was in a state that so many of the climbs put me far into the red and robbed my of any semblance of sustainability.  Oh how I wish I had a power meter back then, so I could compare myself then and now and “forecast” future results.

Well, that’s it for now.  I gotta hop on the trainer and knock out a 3×16-minute over-under interval workout.

Cutthroat Updates

I’ve ridden my Salsa Cutthroat for the past 9 months and made a few more changes to suit my needs a bit more.

Drivetrain

After a lot of research, I determined that the Rival 22 shifters are compatible with my old 2×10 drivetrain components.  I replaced the stock 2×11 (24/36 chainring, 11-32 cassette) drivetrain with a 2×10 crankset (28/42 chainring, 11-36 cassette).

According to my calculations, the granny gear is ever so slightly harder than a 32 front, 42 rear (a common 1x setup).  The top end is noticeably faster with a 42-tooth chainring compared to a 36.  After several hundred miles I haven’t experienced any dropped chains or shift issues, so I’m quite happy.  If I need an easier granny gear, I can very easily remove a cog from the cassette and replace it with a 42-tooth from Wolftooth.

Power Meter

It is finally time to start training with power, so I picked up a Carbon GXP Stages power meter.  Compared to an XX crank arm, it only weighs an additional 20g!  That impressed me a lot, even though that stat is explicitly stated on their webpage.

Tires

I replaced the stock Schwalbe Thunder Burt 2.1 tires with some spare, slightly used Crossmark tires for a bit more traction and volume.

Trainer Wheel

I haven’t owned a smooth-tire road bike for a long time now, and because I live in a second floor condo I haven’t been able to use my CycleOps Fluid2 trainer.  Knobby tires on a trainer are horribly loud!  Winter weather has come to Colorado, so I decided to get a 700c rear wheel.  Unfortunately road thru-axle, disc rear wheels aren’t as common as QR9 wheels, so this was more expensive that I would’ve liked.  Combined with a 11-26 cassette and a trainer tire, it’s perfect for indoor workouts.  Money well spent now that I can do structured power workouts indoors without upsetting the neighbors too much.

Finishing Kit

The handlebars are now decorated with Fizik Bar Gel pads and cork bar tape.  Time will tell if it reduces hand fatigue from long miles on rough roads.

New Bike: Salsa Cutthroat

Just over a month ago I listed my Ridley X-Trail on Craigslist and started looking for a replacement.  At the time I had the “Which Bike Should I Buy” copy of Bicycling magazine to look through.  Out of the dozens of pages of bike recommendations for various specialties and criteria, the one that resonated most with me was “I want to go bike camping.”  (I guess bikepacking isn’t a common enough term yet.)

The main recommendation was a Salsa Fargo 27.5+ with the Salsa Cutthroat and Salsa Warbird as nearby options.  I was looking for something between gravel bike and rigid mountain bike, so the 27.5+ wheels didn’t entice me.  The 29er version of the Fargo didn’t either – it weighs in at 28 lbs.  That’s a lot for a rigid mountain bike!  The Warbird is very similar to the X-Trail, so that’s not what I wanted either.  What about the Cutthroat?

I never considered the Cutthroat as a bike I wanted ever since it debuted during the 2015 Tour Divide.  In my mind it was a racer-only bike.  Plus my Mooto-X set up rigid could achieve nearly the same purpose.  Well, I started considering it.  The Cutthroat has a LOT of features that I really like:

  • Six bottle cage mounts – three in the triangle, one under the downtube, two on the fork!
  • Thru-axle spacing
  • Accepts a 28/42 chainring (or 38t 1x)
  • Carbon fiber fork
  • The thing is meant for events like the TD, so I feel less bad about subjecting it to tough conditions
  • Decently light at ~23 lbs

A local shop had one in stock so I stopped by for a test ride.  I loved it!  It fills the gap between gravel bike and rigid mountain bike perfectly.  A week or so later, I was the proud owner of a new Cutthroat.

Impressions

One month in, I’m still extremely pleased that I replaced the X-Trail with the Cutthroat.  It does everything that I want it to.

  • The Cutthroat is noticeably more aerodynamic that the rigid MootoX.
  • It seems to be comfortable enough for all day rides, though I’ve only done ~5 hours max so far with zero discomfort.
  • I LOVE having three bottles (2x 750ml + 1x 1l) inside the triangle for long, remote adventures.
  • With the X-Trail I was worried about scuffing/damaging the matte carbon fiber.  I feel less worried about that with the glossy Cutthroat finish.  Weird.
  • Getting in the drops on steep climbs helps keep my weight down/forward and is surprisingly stable.
  • On rough or fast descents, getting in the drops is also preferred for extra control and braking power.
  • I’m not as confident on rough descents as on the MootoX.  I think it’ll improve in time, but IMO MTB bars offer more control.
  • The MRP Rock Solid fork seems to dampen vibration more than the Cutthroat fork.
  • My hands do get a bit sore after being in the drops for long descents.  I think this is part of the adjustment phase, though.
  • The rear end of the bike feels “springy” compared to the MootoX YBB.  A few times on washboarded downgrades my underside would get smacked if I hovered just out of the saddle.  I’m sure a change in technique will fix this- either stay on the saddle or give it room to move.

Updates

Within the first few rides I set the wheels up tubeless (I measured a weight saving of ~100g per wheel), upgraded the front rotor to 180mm, swapped the stock saddle for a Specialized Phenom, and wrapped much the frame in protective tape.

The stock drivetrain comes with a 24/36 chainring and 11-32 cassette.  I wish it came with a 28/42 chainring and 11-36 cassette to have a much higher top gear without sacrificing much on the granny end.  My personal gear ratio/speed calculation shows the stock drivetrain running from 3.84 to 27.93 mph at cadences of 60 and 100, respectively, compared to a range of 3.98 to 32.59 mph with the 28/42 + 11-36.  I’m considering swapping my spare MTB 2×10 drivetrain (which can achieve these ratios) onto the Cutthroat down the road, but I haven’t researched the compatibility issues with the shifters.  Maybe I’ll change my mind when I load it up with bikepacking gear.

Rides/Adventures

So far I’ve been able to take it on a few decently large weekend rides.  Rides I would never consider doing on the X-Trail.  That’s how I know this is the right bike for me.

Gross Res Loop
50 miles, 6200ft elevation: Up, up, up Super Flag, a quick paved descent to Walker Ranch, then some gravel, 4WD, and light quad trail to Gross Reservoir via 86J.  Wave to some bikepackers as we cross paths.  Filter water, eat, and watch helicopters pull water from the reservoir for firefighter training.  Backtrack on the trail to Flagstaff Rd then descend to South Boulder Creek below the dam.  Filter more water and pat myself on the back for climbing 5,000+ feet over 27 miles so far!  Climb away from the creek for 3.1 miles.  At the top, reach 6,100 ft of climbing over 30 miles.  Nice!  I earned the LONG paved descend to CO 93 (though I wish I had a 42t big ring).  Take CO 93 all the way into Boulder.

Spring Ramblings
42 miles, 5500ft elevation: start with the long, steady ascent up Fourmile until the Salina Junction where the climb becomes double steep.  Four-ish ouchy miles later I’ve reached Gold Hill.  Continue straight at the stop sign and start the 1-mile 14% rough downgrade, riding the brakes more than I should.  Take a left on Lefthand and continue back up.  Time to start earning back that 750 ft of elevation I just lost.  Grind away on pavement for 5 miles, then cut back onto gravel and climb steep again on Sawmill.  Don’t look over your shoulder as you’ll get vertigo.  Maybe it’s just me, though.  Top out and start on up-and-down-but-mostly-down gravel back to Gold Hill.  Once through GH climb up the 0.3 mile, 11% ass kicker climb before the Sunshine Canyon descent.  Descend down Sunshine – first gravel, then pavement – all the way back to Boulder.

Out With The Old…And New

Last year I decided it was time to replace my road bike.  It was old, a bit small, and lacked the gearing I like for steep mountain climbs.  The Fuji Roubaix was my first road bike, my first “real” bike, bought a few months after returning from the Great Divide.

Old Fuji Road Bike (looking clean with new cables/components for Craigslist)

I probably logged 10,000+ miles on that bike over it’s life.  In the year leading up to last, though, I rode it less and less.  Given a choice between grinding gravel with my MootoX set up rigid and the riding pavement on the road bike, I’d almost always choose the former.

I decided that the replacement bike should be a proper gravel bike.  That way it would get more use.  After doing many hours of research over the winter I settled on a Ridley X-Trail.  A few months later, I became the proud owner of one.

X-Trail in Early April


X-Trail In Late April

It’s quite a fancy machine – with a carbon frame, hydraulic disc brakes, internal cable routing, and thru-axle wheels.  My MootoX frame doesn’t even have thru-axles (or internal routing), but then again it is 10 years old now!

I was very happy with the X-Trail.  I could climb SuperFlag with the 34/32 granny gear and eat up gravel roads + (very) tame singletrack with 36mm gravel tires set up tubeless.  With a dedicated gravel road bike, I could keep the MootoX set up with a suspension fork for trail riding.

Near the end of Summer I swapped the MootoX fork back to rigid.  I wanted to use it for the 2016 Gold Rush Bike Rally, then the 2016 Hundred Miles of Nowhere.  I kept it rigid for the winter after that.  I’d rather not expose the Lefty to the elements, nor could I bring myself to ride the X-Trail in winter conditions.

Rigid MootoX For 2016 Hundred Miles of Nowhere

In January I started riding more consistently to warm up my legs for the Old Man Winter Rally – a 65 mile gravel ride with 5,500+ ft of climbing.  I’d swap between riding the MootoX and the X-Trail, depending on the day.  Unseasonably warm weather in January brought lots of wind.  After becoming used to the stability of a mountain bike, strong crosswinds on gravel made me nervous – especially with the narrow bars and narrow  tires.

The X-Trail was the ideal bike for the course.  Gravel tires for the gravel roads without being excessively slow on pavement, light weight, and more aerodynamic in case of strong headwinds.  Regardless, I felt more comfortable riding the MootoX for a few reasons:

  1. I wanted more stability and a more comfortable position
  2. I was uncertain about the weather (I get super cold hands) and wanted to be able to overpack warm gear (along with food).  The Revelate Tangle bag on MootoX was perfect.  And, no, attaching a tangle bag to the X-Trail was not an option.
  3. The course features two steep climbs late in the race, which I preferred to tackle with easier gears.
  4. I rarely ride a road bike over 50 miles.  Beyond that I prefer the comfort of a mountain bike + frame bag capacity for food/water/clothing.
  5. It’s always fun to hear “Nice Moots” when riding.

The rally was a lot of fun.  I finished in (what I consider) a respectable 4h 35m.  I’m sure I could have finished faster with the X-Trail, but not nearly as comfortably.  I wasn’t out there to race.  Riding the MootoX was a good choice for me.

I’ve been thinking about the rally recently: Why didn’t I ride the X-Trail?  Honestly, I’m not as comfortable on it as I’d like to be.  It also feels like a bike that should be pampered more than I like.  Maybe I’m just a bit paranoid because it is my first carbon fiber framed bike.  It’s probably a bit of both.  I love maintaining and working on bikes (I literally spent 3 hour tonight swapping the MootoX’s drivetrain from 2X to 1X and replaced cables/housing).  I don’t like worrying about whether today’s weather/trail conditions are too harsh for the bike.

At the same time as I was thinking about this stuff, the “Which Bike Should I Buy?” copy of Bicycling magazine shows up.  How appropriate!  It got me thinking about which bikes would be in my ideal fleet.

The conclusion I reached is that the X-Trail, even though it is a very fancy, very awesome machine, doesn’t fit in my ideal fleet.  I could hang onto it for occasional gravel rides, but it’s a lot of money and space to dedicate to something I don’t completely love.  I have decided to list it on Craigslist and put the money towards something different…something I know I will love.

More on that later.

Summer Plans

No Tour Divide this year.  I feel like I’ve said that a lot in the past few years.

Why not?  I’m still not 100% sure that racing the TD is something I want to do.  As you might have noticed, I go back and forth on a monthly basis.  I don’t want to train for the race…and then back out a week before the Grand Depart again.  It’s a waste of time, energy, and money!

I decided a few weeks ago to pursue other things this year.  So far I’m very happy with it!  Now that I don’t have to give so much of myself toward training, I have compiled a list of things I want to accomplish.  It’s kinda fun to be able to think like this again.  I want to:

Mountain bike for fun
Grinding gravel to build strength is getting a bit old.  I have removed the aerobars and bikepacking bags and visited some singletrack.  It is refreshing after so many paved and gravel roads.  I’m nearly done servicing my Lefty fork and really look forward to riding with front suspension again.

Increase my freelance hours
I don’t know how people train for the TD with full time jobs and/or families.  As a freelancer with a girlfriend sign-off on doing the TD, I had it so easy.  I changed my work hours as training required on a whim.  No managers to ask permission.  No commute to/from work.

Sometimes the projects I work on aren’t the most fun.  It is so easy to get distracted by the TD and internet.  Last year I did lots of internet searches like “tour divide tires,” “tour divide water filter,” “tour divide training.”  Basically “tour divide” followed by any/every piece of equipment.  Countless hours of freelance time was sacrificed to this “research.”  Deep down I knew it was far more important to accept that the gear I had was good enough, get on the bike and ride, and find out from experience whether certain equipment decisions could be optimized.  But with no one looking over my shoulder, flexible schedules, and boring/frustrating projects, I indulged a lot.

Work on side-projects
Right before last year’s TD, I refactored my outdated-ish Great Divide Elevation Profiler with a TD2015 version.  I’d like to combine both sites into one, where you can choose between the Tour Divide’s route and the ACA official Great Divide route.  Eventually, I’d like to be able to make the web app powerful enough to let riders select between the numerous GRMBR alternate routes.  It’ll be an interesting programming puzzle to solve.

Lots of other projects I want to work on, too.

Give backpacking a try
Backcountry travel without a mountain bike?!?  I think it could be fun.  There are lots of wilderness areas within an hour’s drive of Boulder that are off-limits to bikes.  I wonder what they look like.  Coming from a bikepacking background, I already have all the necessary lightweight, compact equipment.  I just need to get a backpack to haul it.

Big Summer Plans

Colorado Trail
Maybe half of it.  Maybe the whole thing.  I think it would be fun to spend a week or more on the CT.  I took a bus home from Salida in 2013 after finishing the first half.  I wasn’t prepared for so much hike-a-bike and rocky ascents/descents.  I didn’t know what to expect, but now I do.

It’d like to see if I can prepare better for the CT’s conditions.  A lot of the trail I had to hike-a-bike probably was rideable with better technical skills.  I’d also like to experiment with gear weight distribution that might make it easier.  Less weight in the handlebar/seat bags, more into the frame bag and backpack might make bike handling easier.

Personal Tour Divide Sampler
Next winter, my mind will almost certainly wonder about racing the Tour Divide in 2017.  It has happened for the past few years.  I need to find out whether the TD is something I want to do.

I’m considering doing a 5-7 day trip on the Great Divide in TD style.  Fully-rigid bike, aerobars, only and all of the gear/clothes I would bring for the Grand Depart.  As many miles per day as I could manage.  Hopefully 100+ miles. Ideally 125+ miles.  That number isn’t as important to me as simulating full days and late nights in the saddle.  Distance is more a function of strength, and I don’t know how much I want to or will be able to train for this.

Whatever it takes it answer: do I want to do this for 20+ days in a row?  If so, how much training is necessary?  How many days should I aim for?  What is the route and climbing actually like?  I was a completely inexperienced rider 6 years ago with twice as much gear.  How will Dave version 2016 fare?

I can leave from Boulder and hook up with the Great Divide 80 miles west of here – just south of Kremmling.  It is ~360 miles from Boulder to Del Norte following the GDMBR.  Well, it doesn’t seem right to turn around just before the largest climb/highest point of the route, so make it ~415 miles from Boulder to Platoro.  Turn around and take US 285 from Del Norte to Salida makes it a ~550 mile trip.  Here’s the route on Strava

As an added bonus, I’d get to see the Del Norte=>Salida segment of the GDMBR we skipped in 2010.


We’ll see what happens.  For now, I’m just itching to get the Lefty fork set up again so I can start enjoying (rather than just surviving) singletrack.

Moots Quick Review

How do I like my recently-built MootoX YBB?  I’ve been meaning to write up a 4-month review, but in a sentence: I love everything about my it.  I’ll keep the rest brief for now:

XX1
I don’t find myself missing the extra gears of a 2×10. I started with a 34t ring and it sufficed for nearly every ride. Only after 10 hours in the saddle would I want lower gears on the steep climbs. Since stopping my TD training, I swapped to a 30t ring for the lower option on rides like this:

I spin out a few MPH sooner than before (~25 MPH), but have a much lower granny for easier climbing.

The only downside to XX1 (besides price) is the rear cassette has noticeable bigger jumps between gears. Sometimes I’ll be riding and can’t find the right gear. Either I’ll spin too fast or mash too hard. It’s less noticeable with the 30t – the jumps may be the same percentage, but the absolute difference is smaller.

Lefty
The Lefty fork is awesome. Anyone who asks about it gets the whole speech about how roller bearings are far superior to stanchions. The fork hasn’t undergone any maintenance since being rebuilt just prior to me purchasing it. Put it on my list. One time I went a few weeks without riding it and noticed the first compression was a bit sticky. But that never happens with regular use. The lock-out mechanism is extremely solid, too.

YBB
The YBB definitely does…something. I see it compressing slightly under hard pedal strokes even on pavement. I can’t really watch it when on the trail, obviously. I’d be really curious to ride a clone of my bike, but a non-YBB version to see if I notice the difference. You’re not supposed to lock it out (it could damage the slider), but maybe I’ll give it a try for one less intense ride.

Overall, I love the bike. I hope it lasts years and years.